If you’re planning to refresh your Adelaide home’s exterior with a new coat of paint, there’s one step you can’t afford to skip: proper wall cleaning. Skipping this step is like building a house on shaky foundations. No matter how premium your paint is, it won’t stick properly to dirty, contaminated surfaces.
In this guide, we’ll walk you through exactly how to clean exterior walls before painting, using methods that work in Adelaide’s unique climate conditions – with practical advice from Surface Rescue, Adelaide’s experts in professional exterior cleaning and surface preparation.
Why Cleaning Exterior Walls Matters Before Painting
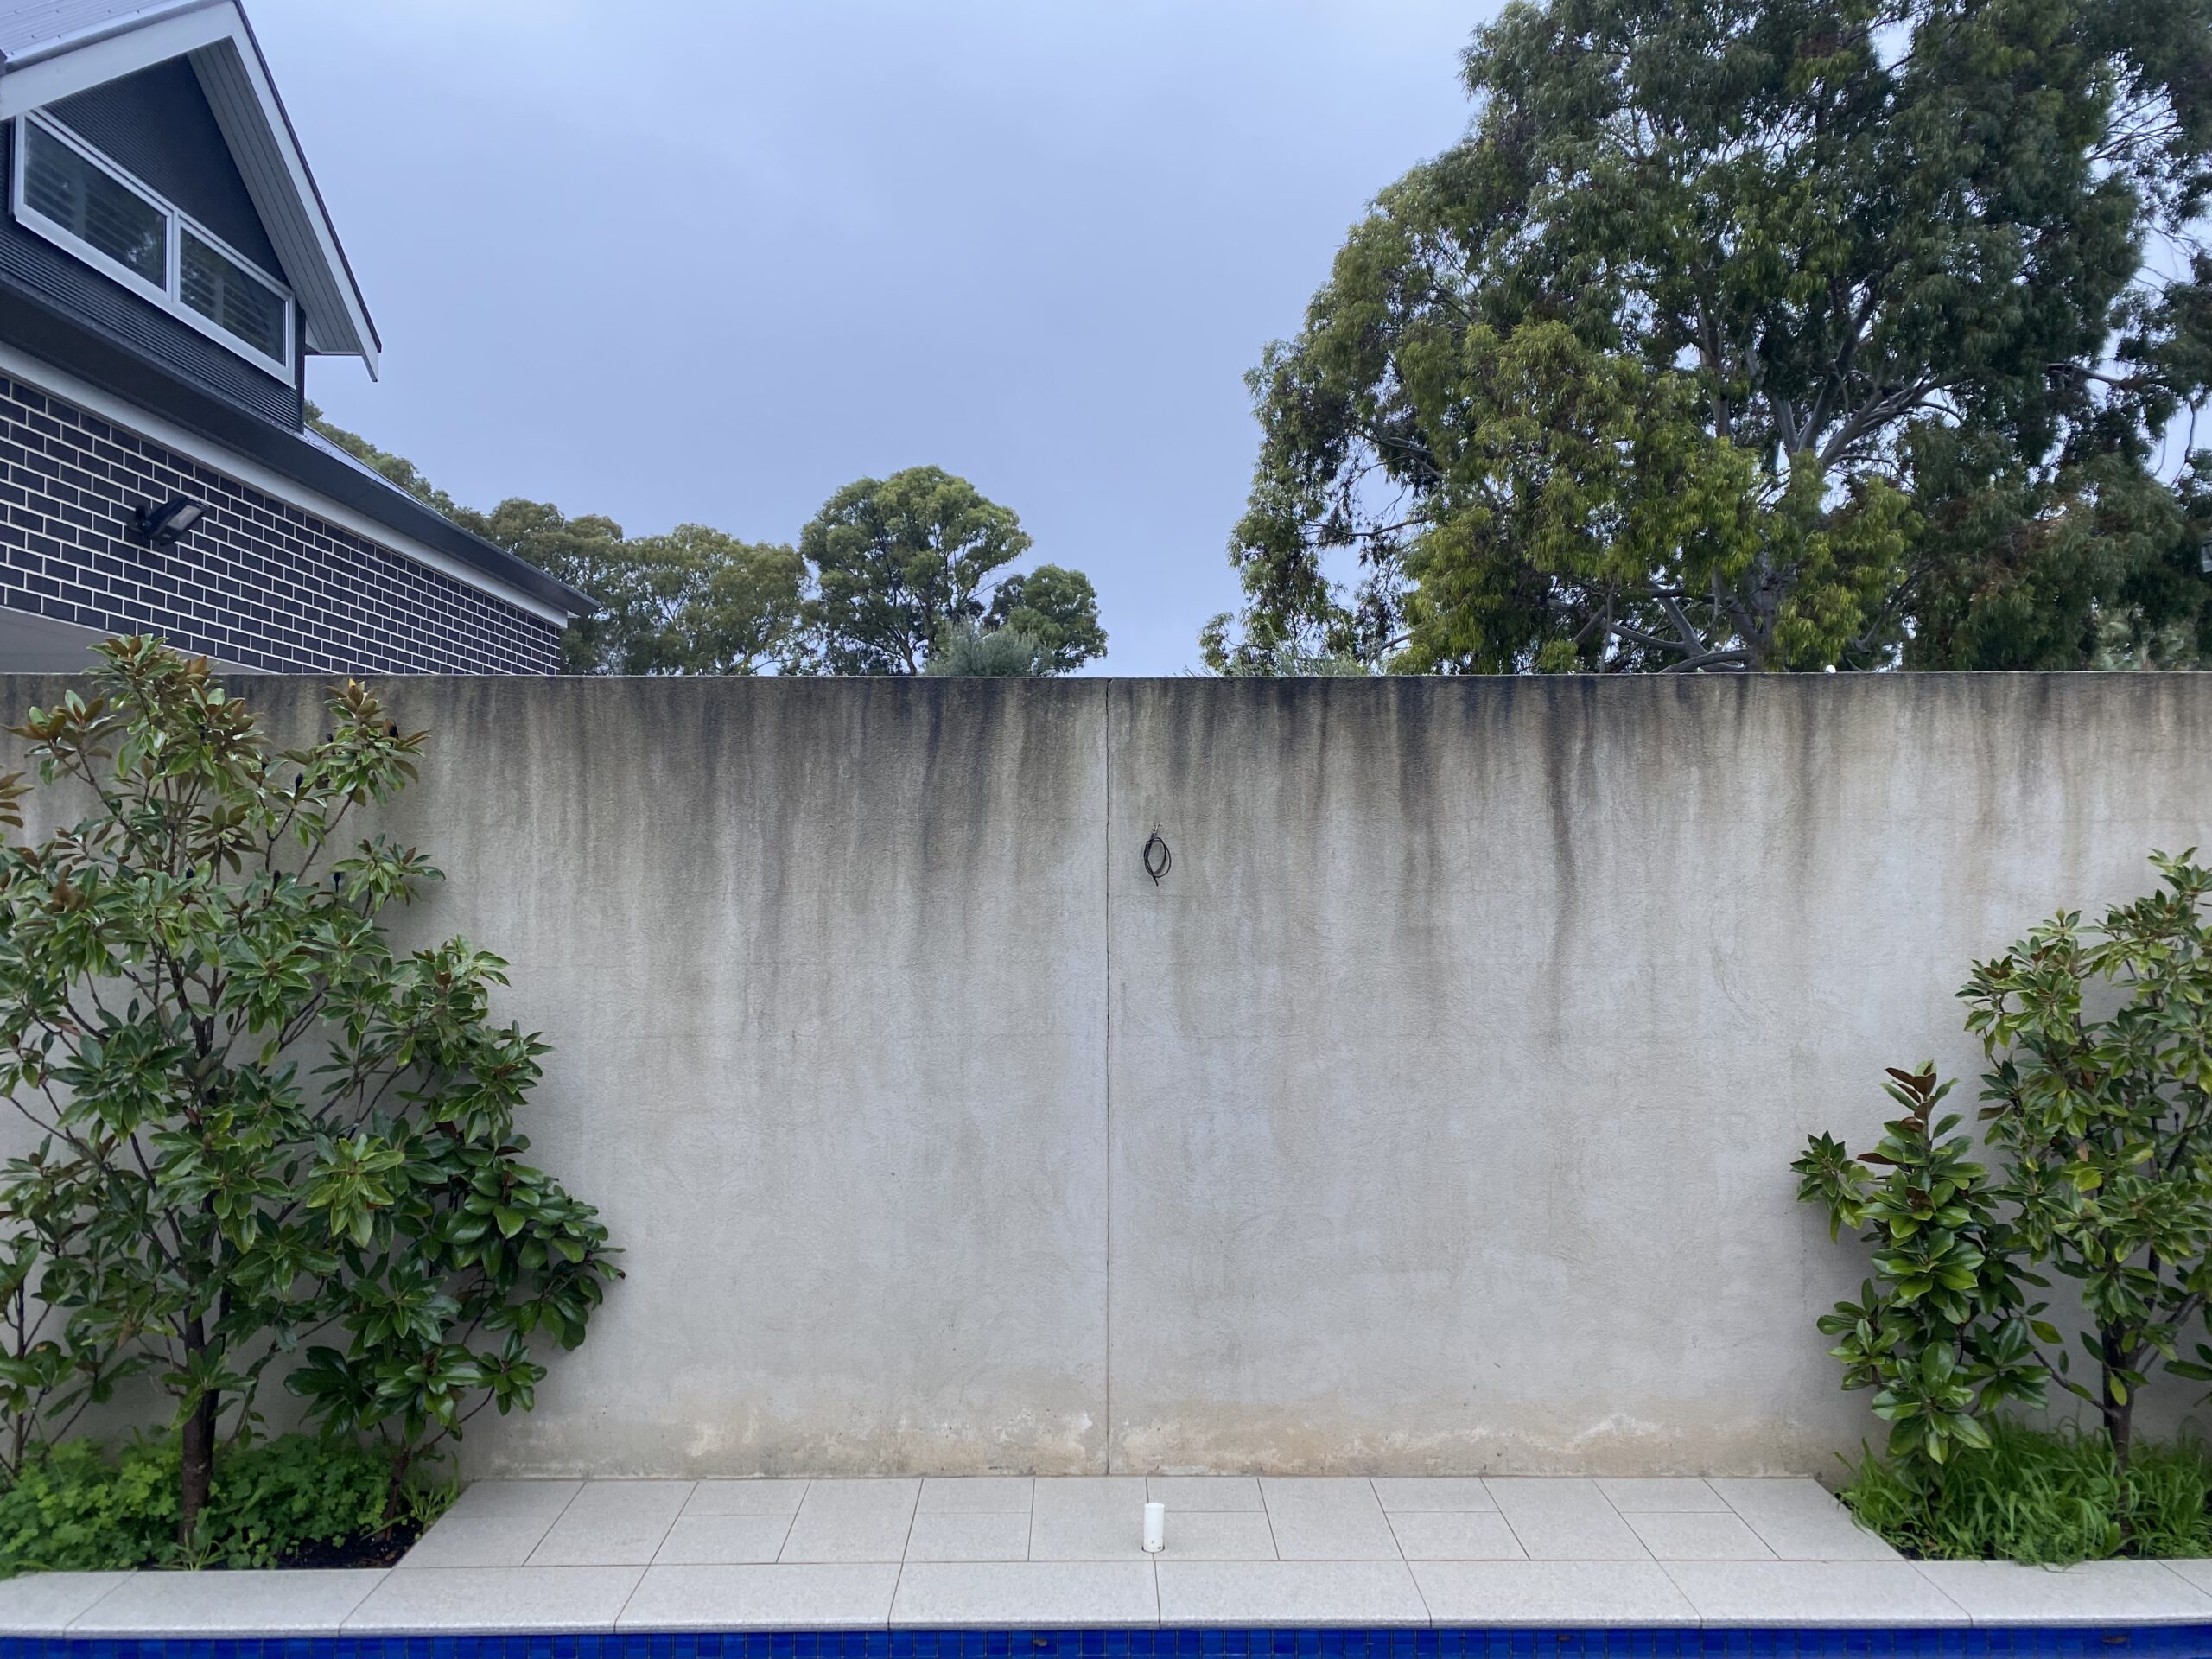
Adelaide’s weather can be tough on exterior surfaces. Between summer dust storms, winter rains, coastal salt spray, and general grime buildup, your walls accumulate more than just visible dirt.
Paint needs a clean, sound surface to bond properly. If you paint over dirt, mould, or chalky residue, you’re setting yourself up for peeling, bubbling, and premature paint failure. Professional painters know that 80% of a quality paint job comes down to preparation, and cleaning is the foundation of that prep work.
Beyond adhesion issues, contaminants like mould can continue growing underneath fresh paint, eventually breaking through and ruining your finish. That’s why thorough cleaning isn’t optional; it’s necessary for a lasting result.
Assessing Your Wall Type and Condition
Before you start cleaning, take time to assess what you’re working with. Different wall materials require different approaches.
1. Brick and masonry walls are generally tough and can handle higher-pressure cleaning, though you still need to be careful around mortar joints. Rendered or cement walls are common in Adelaide and typically respond well to pressure washing when done correctly.
2. Weatherboard, timber, or Hardiplank surfaces need gentler treatment. Too much pressure can gouge timber, force water behind cladding, or damage protective coatings.
3. Walk around your property and look for loose or flaking paint, cracks, mould growth (often green or black staining), and chalky residue when you run your hand across the surface. These issues need addressing during your cleaning process.
Choosing the Right Cleaning Method for Adelaide Conditions
Adelaide’s climate means your exterior walls face unique challenges. The combination of heat, occasional humidity, and periods of rain creates perfect conditions for mould and mildew, especially on south-facing walls or shaded areas.
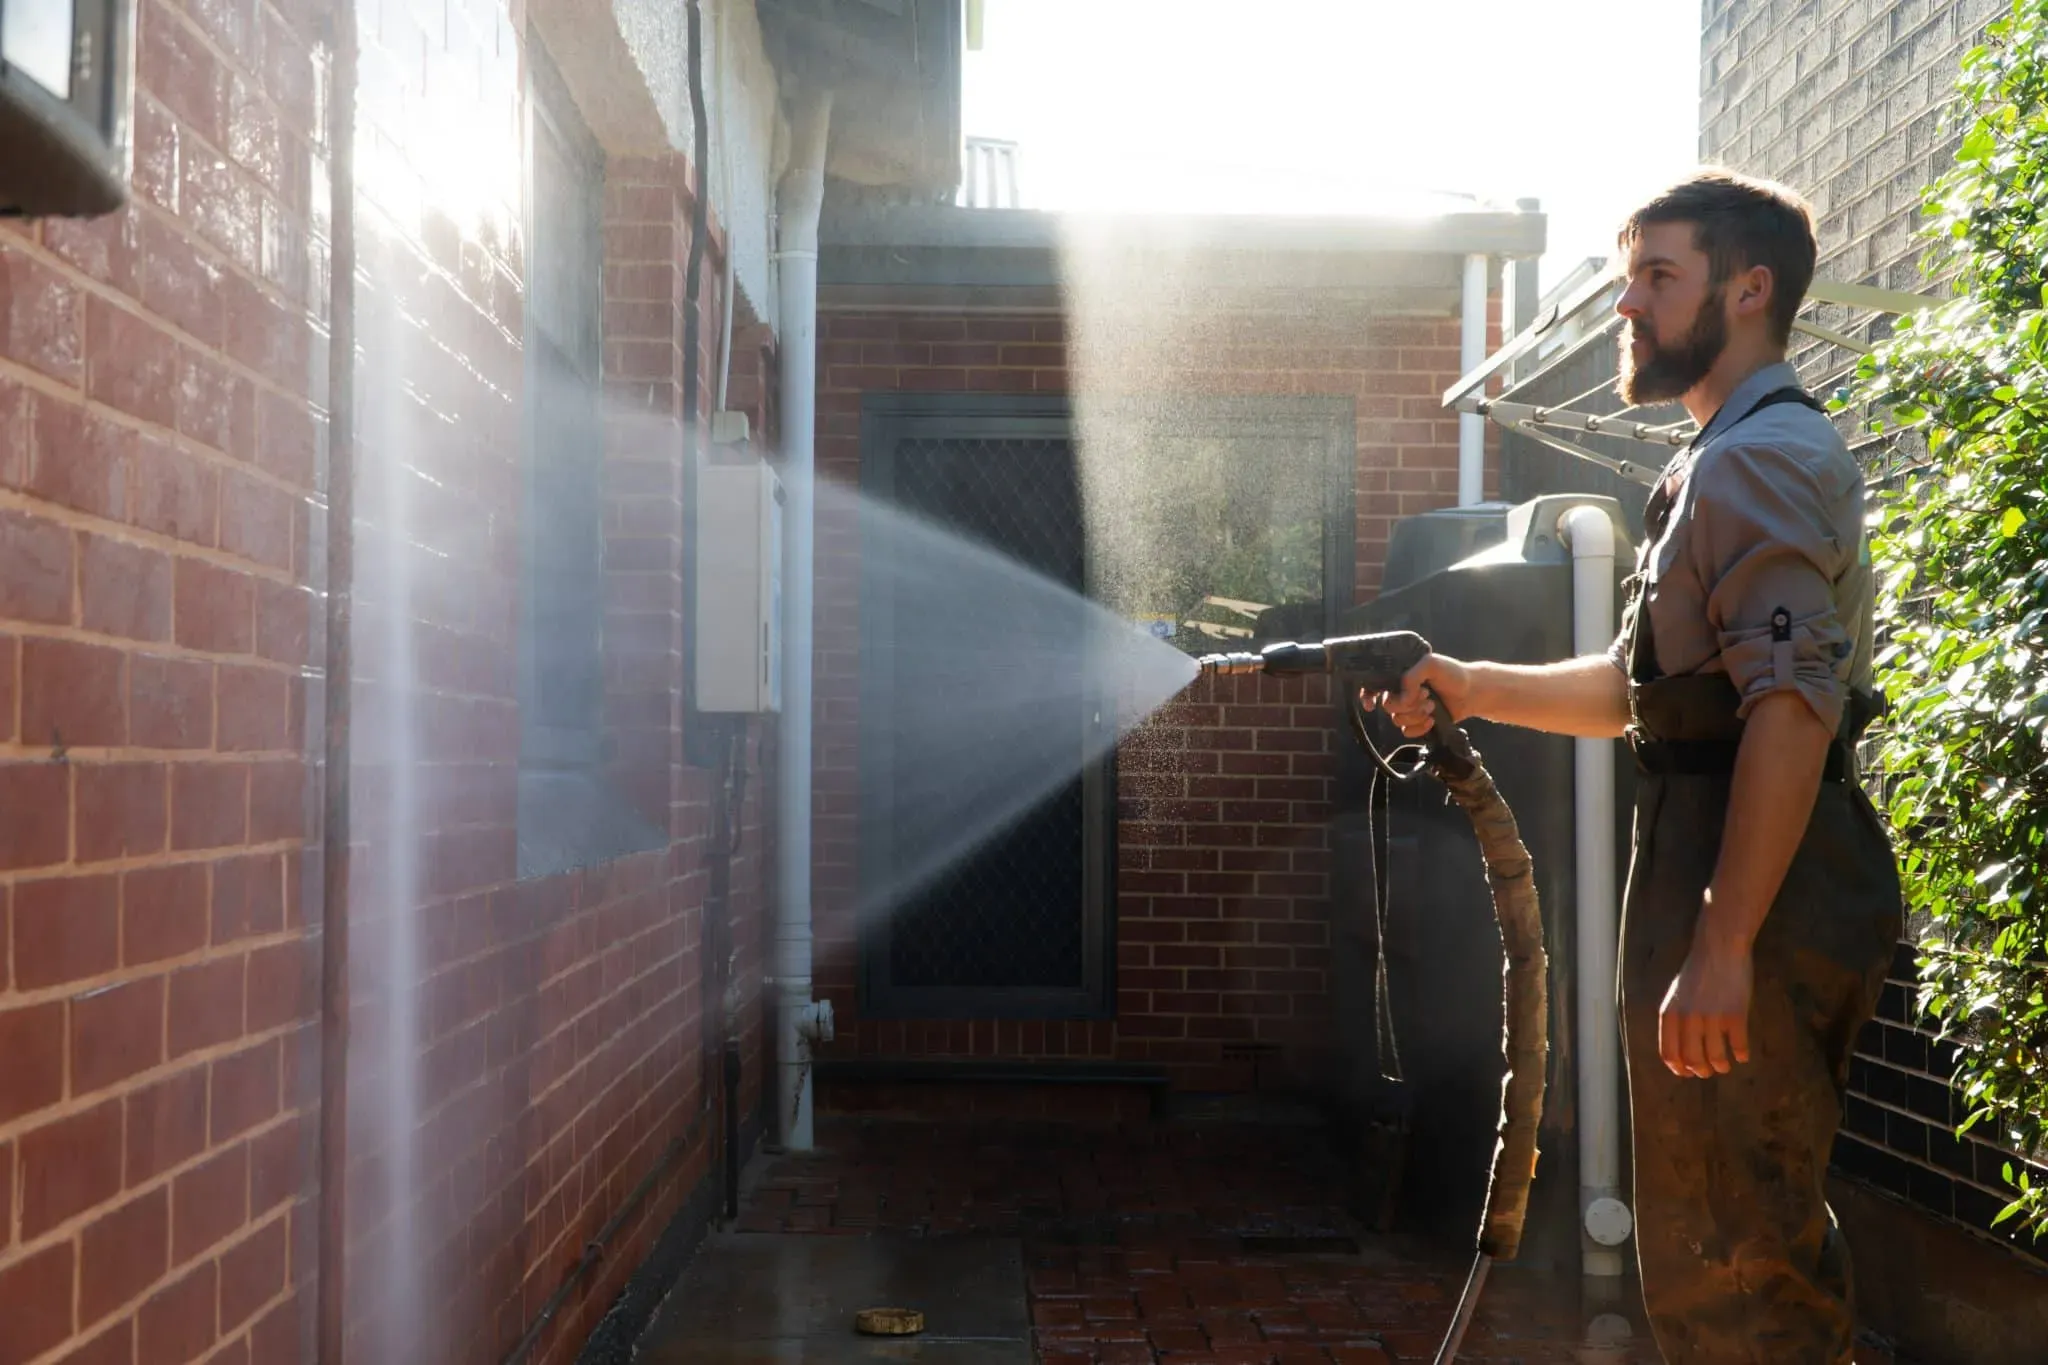
1. Pressure Washing
Pressure washing is effective for hard surfaces like brick, concrete render, and painted masonry in good condition. Using a pressure washer rated between 2,000 to 3,000 PSI allows you to strip away years of grime efficiently.
But pressure washing isn’t suitable for every surface. Older painted surfaces, weatherboards, or delicate materials can be damaged by high pressure.
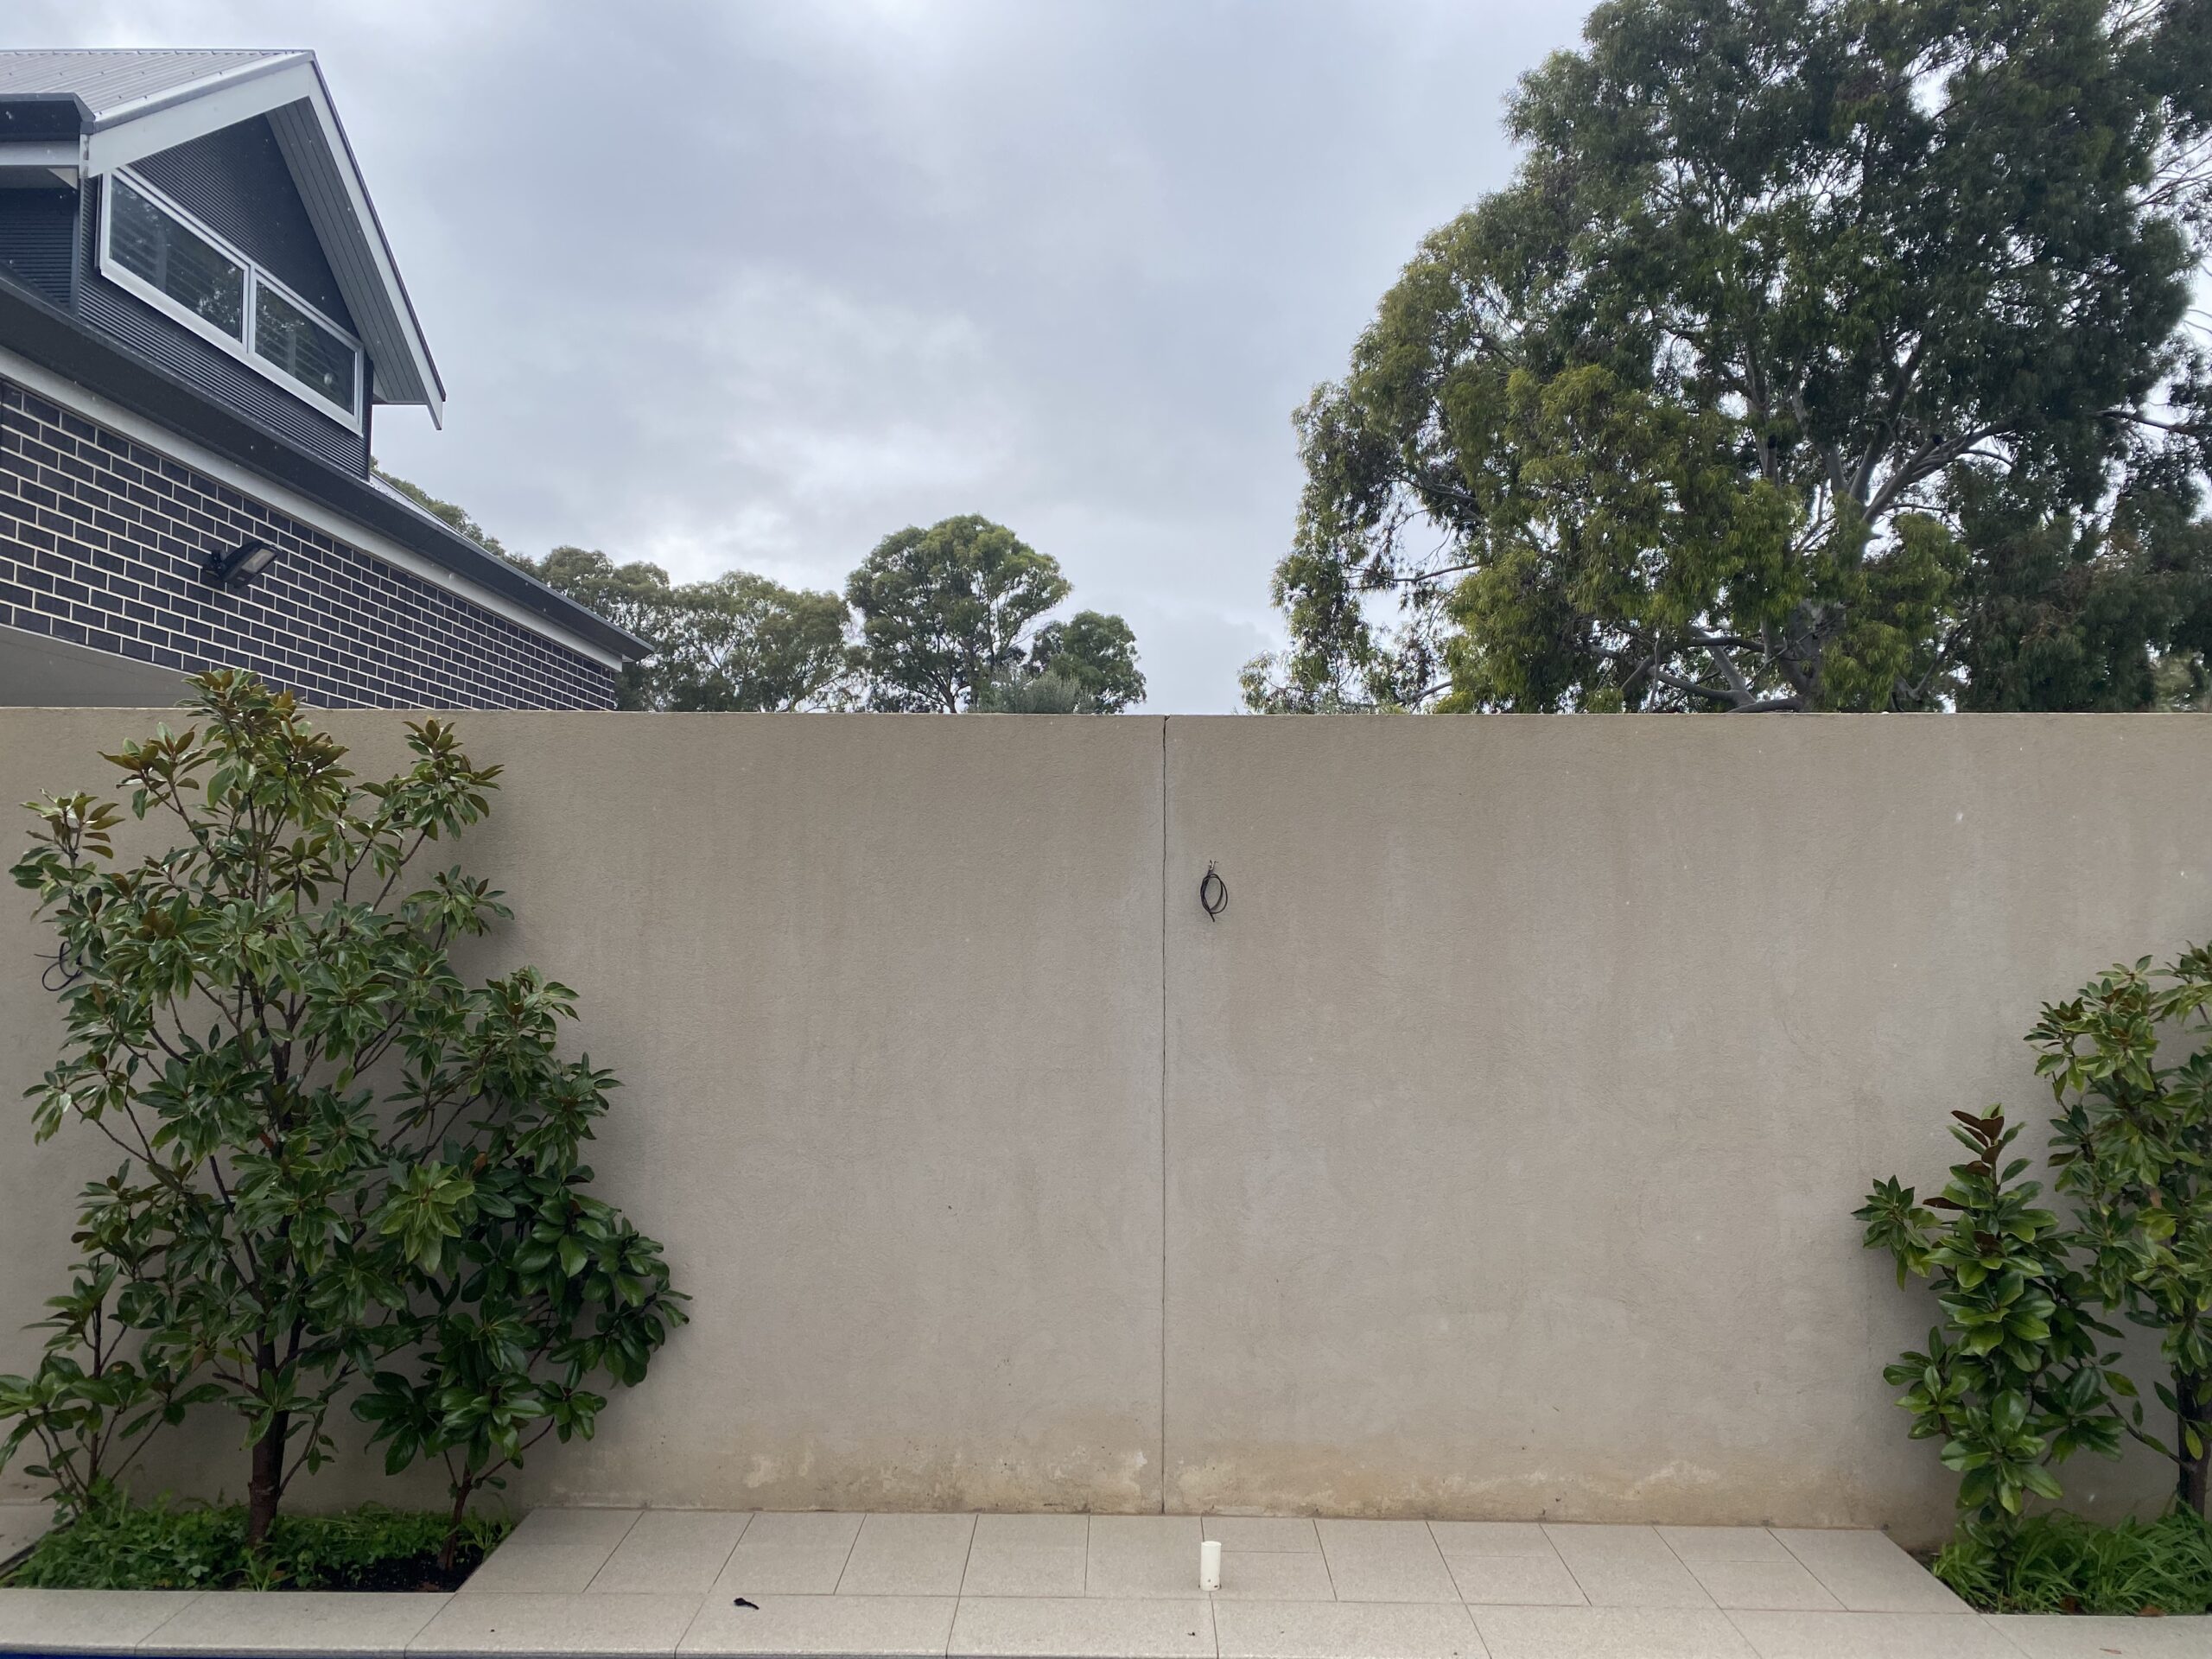
2. Soft Washing
For delicate surfaces, soft washing is the smarter choice. This method uses low-pressure water combined with biodegradable cleaning solutions that break down mould, algae, and dirt at a molecular level.
📖 People also read about:
Soft washing is particularly effective for painted weatherboard, render with existing paint, and any surface where you’re concerned about damage. At Surface Rescue, we use soft washing extensively across Adelaide because it cleans thoroughly without compromising the integrity of your surfaces.
Step-by-Step Cleaning Process
Here’s how to properly clean your exterior walls before painting:
Step 1: Clear the Area
Move furniture, pot plants, and any outdoor items away from the walls. Cover garden beds with drop sheets and protect any features you don’t want soaked, like external power points or vents.
Step 2: Dry Brush and Scrape
Use a stiff brush to remove loose dirt, cobwebs, and flaking paint. For areas with peeling paint, a scraper helps remove anything that’s not firmly attached. This prevents you from just sealing loose material under your new paint.
Step 3: Apply Cleaning Solution
For general grime, a solution of warm water and mild detergent works well. For mould and mildew, you’ll need something stronger. Mix one part bleach to three parts water, or use a specialised exterior cleaning solution.
Apply your chosen cleaner from bottom to top to avoid streaking. Let it sit for 10 to 15 minutes (but don’t let it dry on the surface).
Step 4: Wash and Rinse
If using a pressure washer, keep the nozzle at least 30cm from the surface and use sweeping motions. Work from top to bottom, rinsing away the cleaning solution and all loosened dirt.
📖 People also read about:
For soft washing, apply gentle pressure and let the cleaning solution do most of the work. Rinse thoroughly with clean water, ensuring no detergent or bleach residue remains.
Step 5: Allow Proper Drying Time
This step is critical but often rushed. Your walls need to be completely dry before painting. In Adelaide’s dry summer, 24 to 48 hours is usually sufficient. In cooler, more humid conditions, allow up to 72 hours or even longer for masonry surfaces that hold moisture.
Post-Cleaning Preparation Steps
Once your walls are clean and dry, there’s still work to do before painting:
✓ Check for damage. Look for cracks, holes, or areas where mortar needs repointing. Use appropriate fillers and sealants to fix these issues.
✓ Sand rough areas. Use 80 to 120 grit sandpaper to smooth any rough patches or edges where old paint was removed.
💡 Need help?
We offer professional commercial industrial exterior cleaning services to help you achieve your goals.
✓ Apply primer where needed. Bare surfaces, patched areas, and stains that might bleed through your topcoat all benefit from a quality primer.
When to Call in the Professionals
While cleaning exterior walls is a manageable DIY task for many homeowners, some situations call for professional help. If you’re dealing with a multi-storey home, extensive mould growth, delicate heritage features, or you’re simply unsure about the right approach, it’s worth getting expert advice.
Professional exterior cleaning services have the right equipment, experience with different surface types, and knowledge of how Adelaide’s conditions affect different materials. They can spot potential issues before they become expensive problems and ensure your walls are genuinely ready for paint.
Ready to Restore Your Adelaide Home’s Exterior?
Properly cleaning your exterior walls before painting isn’t just about aesthetics; it’s about protecting your investment and ensuring your new paint job lasts for years to come. Taking the time to do it right means you won’t be repainting again in a few years because of premature failure.
At Surface Rescue, we’ve been helping Adelaide homeowners and businesses restore and protect their exterior surfaces since 2019. Our team knows exactly what it takes to prep surfaces properly using techniques that work with Adelaide’s climate, not against it.
Whether you need professional exterior cleaning before your painting project or want expert advice on the best approach for your property, we’re here to help. Call us on 0475 399 746 or book a consultation to discuss your project.
FAQs
1. Why is it important to clean exterior walls before painting?
Cleaning removes dirt, mould, chalking, and loose debris that can prevent paint from properly adhering. Proper preparation helps the new paint last longer, look smoother, and resist peeling or blistering.
2. What is the best way to clean exterior walls before painting?
Most exterior walls can be cleaned using a mild detergent, soft brush, and hose or low-pressure washer. For stubborn mould or mildew, a specialised cleaning solution may be needed before rinsing thoroughly.
3. How long should I wait after cleaning before painting?
It’s best to allow exterior walls to dry completely for at least 24 to 48 hours before painting. This ensures moisture doesn’t get trapped under the paint, which can lead to peeling or bubbling later.